

We have all been there. The sofa looks perfect online, the dimensions seem reasonable — and then it does not fit through the front door. Or the dining table arrives and the chairs cannot pull out without hitting the wall. Knowing how to measure a room for furniture is not just about jotting down the length and width of the floor. It means understanding room shell, wall layout, clearance space, door swing, delivery path and the actual footprint of every piece you plan to buy.
This guide walks you through every step — from the tools you need to a pre-purchase risk matrix — so you can buy with confidence and move nothing back.
Quick Answer
- Measure room length, width and ceiling height.
- Mark doors, windows, outlets, switches, radiators, columns and baseboards.
- Compare the furniture’s outer dimensions against usable floor area.
- Leave 60–90 cm / 24–36 in of walking clearance.
- Tape the furniture footprint on the floor with painter’s tape.
- Measure the delivery path: every doorway, hallway, stairwell, elevator and 90° corner turn.
Room Measurement Checklist at a Glance
| Step | What to Measure | Why It Matters |
|---|---|---|
| 1. Room shell | Length, width, ceiling height | Confirms the furniture can fit the room |
| 2. Fixed features | Doors, windows, outlets, vents, baseboards | Prevents blocking access or utilities |
| 3. Furniture footprint | Width, depth, height, opened drawers/doors | Shows real occupied space |
| 4. Clearance | 60–90 cm / 24–36 in walking space | Keeps the room usable |
| 5. Delivery path | Doorways, hallways, stairs, elevator | Ensures the item can enter the home |
| 6. Floor plan | Tape or sketch the layout | Helps visualize before buying |
Table of Contents
- The Pre-Measuring Toolkit: What You Need Before You Start
- Step-by-Step Guide: How to Measure the Room Layout
- Furniture Clearance Rules: How Much Space Should You Leave?
- Measure the Furniture, Not Just the Room
- Crucial Logistics: Measure the Path of Entry
- Turn Your Measurements Into a Practical Floor Plan
- Pre-Purchase Risk Assessment Matrix
- Conclusion: Measure Twice, Buy Once
- FAQ
The Pre-Measuring Toolkit: What You Need Before You Start
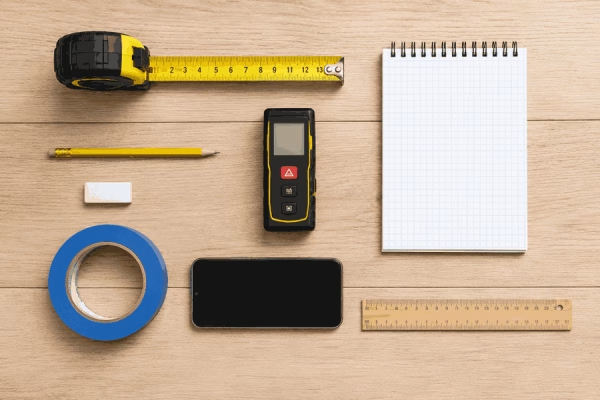
Before you pull out a tape measure, gather the right tools. Measuring a room with the wrong equipment is the fastest way to introduce errors that come back to haunt you at delivery.
Metal Tape Measure
Use a metal tape measure of at least 5 m / 16 ft. It stays rigid over long distances, unlike a fabric tape that sags and stretches. Avoid fabric tape entirely — even a 1–2 cm error can cause a sofa to miss a doorway.
Laser Measure (Optional but Useful)
A laser distance meter is ideal for large rooms or tall ceilings where a tape measure needs a second person. Basic models cost under $30 and give readings accurate to 1–2 mm.
Phone + Graph Paper
Photograph every wall after measuring it. Sketch the room on graph paper (1 square = 10 cm or 1 ft) to plan furniture placement before you buy. Apps like MagicPlan or RoomSketcher can speed this up.
Painter’s Tape
Tape the exact footprint of a sofa, dining table or bed onto the floor. Walk around it, open room doors, pull out chairs, and simulate daily movement. This is the single most effective way to avoid layout regret.
One unit, start to finish. Decide early: are you working in centimetres/metres or inches/feet? Switching units mid-session creates conversion mistakes. Stick with one system throughout and double-check any manufacturer specs if they use the other.
Pro Tip
Bring a helper when measuring rooms wider than 5 m or furniture in packaging. Two people reduce tape sag errors and let you photograph and record at the same time — cutting a 30-minute session down to 15.
Step-by-Step Guide: How to Measure a Room for Furniture Layout
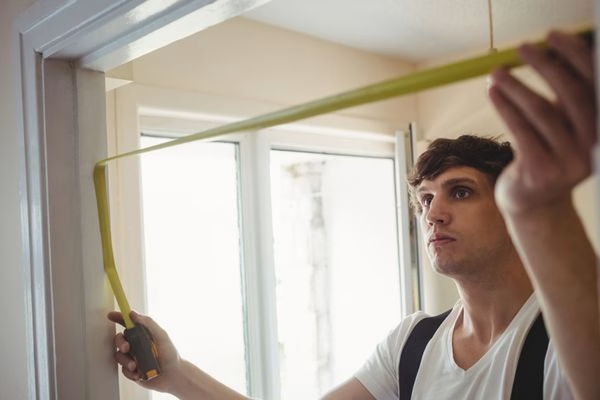
Step 1: Start at the Main Door and Measure Clockwise
Stand at the main entrance of the room. Move clockwise, recording the length of each wall section before you move on to the next. This prevents you from missing an alcove, a chimney breast or a recessed corner — fixed obstacles that eat into your usable floor space.
Step 2: Measure Length, Width and Ceiling Height
Write down three numbers for every room: length, width and ceiling height. Floor-to-ceiling height is critical for tall furniture — wardrobes, bookshelves, display cabinets and some bed headboard designs extend higher than you expect. If crown moulding or a bulkhead reduces the usable height, measure that too.
Step 3: Use the 3-Level Check for Built-In or Wall-to-Wall Furniture
Walls in older homes are rarely perfectly straight. For fitted shelves, alcove units or large dining tables placed flush against a wall, measure at three heights:
- 10 cm / 4 in above the floor (baseboard level)
- 90 cm / 36 in above the floor (tabletop or countertop height)
- 10 cm / 4 in below the ceiling
Use the smallest of the three readings as your working dimension. This protects against walls that bow inward at any point along their height.
Step 4: Mark Windows, Doors and Fixed Obstacles
On your sketch, note the position and width of every:
- Door opening (and which direction it swings)
- Window (including the sill depth and any radiator below it)
- Electrical outlet, light switch and USB port
- Air vent or heating register
- Column, pillar or chimney breast
- Baseboard / skirting board depth (typically 1–2 cm, but can be more with heritage mouldings)
These fixed features reduce the area available for furniture — and blocking an outlet or vent with a solid piece of furniture creates both safety and practical problems.
Pro Tip
Photograph the walls after measuring each one, with the tape measure still in place. These photos are a quick reference when you are back at your desk comparing furniture dimensions — no second trip to remeasure.
Furniture Clearance Rules: How Much Space Should You Leave?
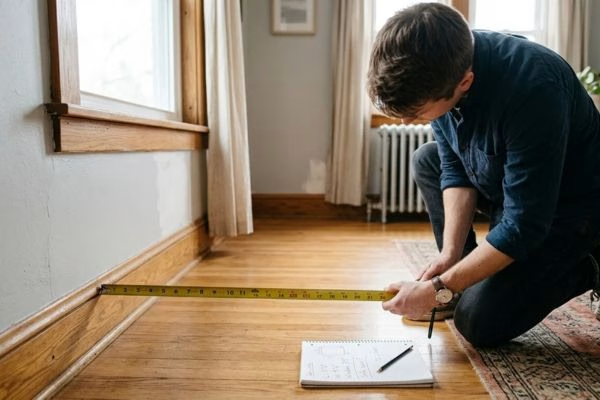
Measuring a room for furniture means measuring the space between furniture, not just the furniture itself. A room where everything fits on paper can still feel cramped and difficult to move around in if clearance is ignored.
General Walking Clearance
- 60 cm / 24 in — minimum acceptable clearance for low-traffic sides of furniture
- 75–90 cm / 30–36 in — standard walkway used daily (beside a bed, behind dining chairs)
- 90 cm / 36 in — recommended where multiple people pass, or where you frequently carry items
Dining Room Clearance
Allow at least 90 cm / 36 in from the edge of the dining table to the nearest wall or piece of furniture. That gap lets a seated person push back and stand up without shuffling sideways. If the back of a chair faces a main walkway, consider 100–105 cm / 40–42 in. For large live-edge or solid oak dining tables, factor in the full chair depth when pulled out, not just the table width.
Bedroom and Living Room Proportions
Bedroom: Aim for 60 cm / 24 in on both sides of a double or queen-size bed. In a small room, one side against the wall is acceptable if the other side stays open. Add the full drawer travel distance when planning a storage bed — a drawer that extends 50 cm / 20 in needs open floor space in front of it.
Living room: A sofa that takes up roughly two-thirds of the main wall tends to look balanced without dominating the room — but this is a guideline, not a rule. Keep at least 40–45 cm / 16–18 in between the sofa front and a coffee table to allow easy foot placement. Avoid a sofa so deep that it reduces the back walkway to under 45 cm / 18 in.
| Area | Recommended Clearance | Notes |
|---|---|---|
| Main walkway | 75–90 cm / 30–36 in | Comfortable daily movement |
| Minimum side path | 60 cm / 24 in | Acceptable for low-traffic areas |
| Dining table to wall | 90 cm / 36 in | Allows chair pull-out |
| Bed side clearance | 60 cm / 24 in | Easier walking and bed-making |
| Drawer opening zone | Drawer depth + 30 cm standing | Prevents blocked access |
| Door swing radius | Full door arc | Keep clear of furniture at all times |
ⓘ Hardware deduction: when placing furniture in an alcove, subtract the projection of handles, door casings, skirting boards and any moulding from your working width. Even 2–3 cm per side adds up.
Pro Tip
A piece that fits perfectly on paper but leaves less than 60 cm on any walkable side will feel cramped every single day. If you are close to that threshold, size down by one dimension — it is a better long-term decision than forcing a large piece into a tight room.
Measure the Furniture, Not Just the Room

Room measurement is only half the equation. The other half is getting accurate furniture dimensions — and not just the headline numbers.
Key Dimensions to Confirm
- Overall width, depth and height
- Seat depth (sofa / armchair)
- Tabletop size (dining table)
- Drawer extension depth
- Cabinet door swing arc
- Headboard height (bed frame)
- Packaging / crated dimensions
Solid Wood: Extra Considerations
Solid hardwood pieces — oak or walnut dining tables, finished oak tops — have thick frames, wide legs and chunky arm rests that add visual and physical bulk. The outer dimension of a solid wood table is often 3–5 cm larger per side than a comparable flat-pack piece. Always check assembled dimensions, not just tabletop size.
For custom or made-to-order furniture, confirm every dimension on the technical drawing before production begins. Changes after manufacturing start almost always incur costs — and with solid wood, they may not be possible at all.
Pro Tip
Always ask for three sets of numbers: assembled dimensions, packaging dimensions and any KD (knock-down) component dimensions. Packaging is often 10–15 cm larger on every side — that matters enormously when the item needs to travel up a stairwell.
Crucial Logistics: How to Measure the Path of Entry

A piece of furniture can fit perfectly in a room yet still be impossible to get there. Measuring the delivery path — every doorway, hallway, stairwell and corner — is a critical step that is almost always skipped until it is too late.
Measure Every Doorway and Hallway
For each door along the delivery route, measure:
- Clear opening width (inside face to inside face — not the door itself)
- Clear opening height (underside of frame to floor)
- Hallway width at the narrowest point
- Ceiling height at any low beam or recessed section
Subtract door handles, hinges, door stoppers and frame moulding — these can reduce the clear opening by 2–4 cm per side. If the item can be partially disassembled (legs removed, doors taken off), verify this with the retailer and note the reduced dimensions.
Can the Furniture Turn the Corner?
A piece may clear every doorway but lock up at a 90° turn — this is one of the most common delivery failures. A long dining table, a twin XL bed frame or a tall wardrobe can become stuck when the hallway before the turn and the hallway after it are both narrow. To check a corner turn, you need four measurements:
- Width of the hallway approaching the turn
- Width of the hallway after the turn
- Depth of the landing or turning area at the bend
- Ceiling height at the turning point
If you are unsure, send photographs and all four measurements to your furniture supplier before placing the order. With solid wood pieces — heavy and often non-flexible — there is no easy workaround on delivery day.
Elevator and Stairwell Checklist
Elevator — 6 Measurements
- Door clear width
- Door clear height
- Cabin interior width
- Cabin interior depth
- Cabin interior height
- Maximum load rating (kg / lbs)
Stairwell — 5 Measurements
- Stair width (between walls)
- Headroom clearance
- Landing depth at each level
- Handrail projection into the stair width
- Angle of turn between floors
Remember: if the furniture is still packaged, use packaging dimensions, not assembled dimensions. The packaging adds 10–20 cm per side and is often the actual limiting factor.
Turn Your Measurements Into a Practical Floor Plan
Graph Paper Method
Draw the room at 1:10 scale (1 square = 10 cm or 1 ft). Mark walls, doorways, windows, outlets and alcoves. Then draw furniture footprints to the same scale and move them around before committing to a layout.
Painter’s Tape Method
Tape the exact footprint on the floor. Walk around it, open doors, open drawers, sit down, stand up. If it disrupts movement, you know before you buy. This is the most reliable no-tech layout test available.
AR and Mobile Apps
Apps like IKEA Place, RoomSketcher and Houzz AR let you visualise scale in real-time. Useful for a quick check — but always verify with a real tape measure before ordering large, heavy or custom pieces.
Pre-Purchase Risk Assessment Matrix
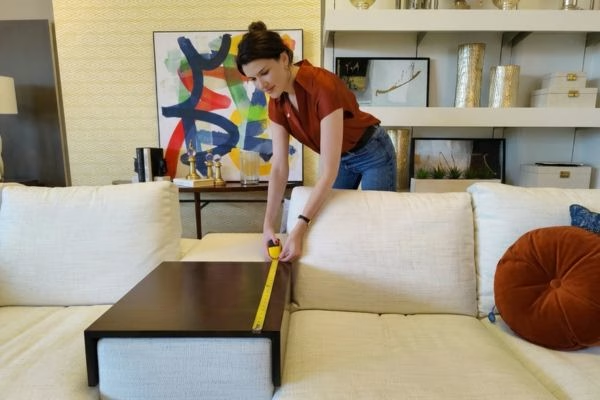
Before placing any order, run through this checklist. If two or more rows come back with a concern, contact the retailer for technical drawings or detailed dimensions before committing.
| Risk Area | Question to Ask Before Buying |
|---|---|
| Room fit | Does the furniture footprint fit the room with clearance included? |
| Walking space | Is there 60–90 cm / 24–36 in of usable clearance on key sides? |
| Dining area | Can every chair pull out 45 cm without hitting a wall or other furniture? |
| Door swing | Can room doors, cabinet doors and drawers open fully without obstruction? |
| Wall obstacles | Will outlets, switches, air vents or radiators be blocked? |
| Visual weight | Will this piece overwhelm the room’s proportions? |
| Delivery path | Can the item pass through every door, hallway, stairwell and elevator? |
| Corner turns | Can the item navigate every 90° corner along the delivery route? |
| Packaging | Are the packaged dimensions smaller than the tightest entry point? |
| Custom furniture | Have baseboards, trim, uneven walls and moulding been deducted? |
ⓘ For custom or solid wood furniture, always confirm dimensions on a technical drawing before production begins. Changes after manufacturing is underway are either costly or not possible.
Conclusion: Measure Twice, Buy Once

Knowing how to measure a room for furniture means going beyond floor dimensions. It means mapping every fixed obstacle, planning realistic clearance, stress-testing the layout with painter’s tape and tracing the full delivery route before a single order is placed.
A piece that “fits the room” on a product page might still block a radiator, trap a door, make chairs impossible to pull out, or simply never make it past your front hallway. Fifteen to twenty minutes of careful measurement eliminates almost all of those risks.
This matters even more with solid wood furniture — heavy, precisely built and intended to last decades. Measure the room, measure the furniture, check the path and trust your numbers, not your gut. The painter’s tape floor test costs nothing and can save a return shipment that costs everything.
Before you order solid wood furniture
Compare your room dimensions, clearance measurements and delivery path against the outer and packaged dimensions of the piece. If you need custom sizing, KD construction or project-based specifications, Moc Luc’s solid wood production team can help you get it right from the start.
Frequently Asked Questions
How do I measure a room for furniture correctly?
▼
What is the minimum clearance around furniture?
▼
How do I measure a doorway for furniture delivery?
▼
What is the best way to measure a living room for furniture?
▼
How much space should I leave around a dining table?
▼
How do I measure ceiling height for tall furniture?
▼
For Project Buyers & Importers
Sourcing solid wood furniture for hotels, retail, or interior fit-outs?
Moc Luc supports solid wood furniture production with custom dimensions, KD (knock-down) construction, export-standard packing and project-based sizing — helping retailers, hotels and interior projects reduce installation, delivery and fit-out risks from the manufacturing stage.